Blog
Pixel Christmas Lights: An Honest Buyer’s Guide

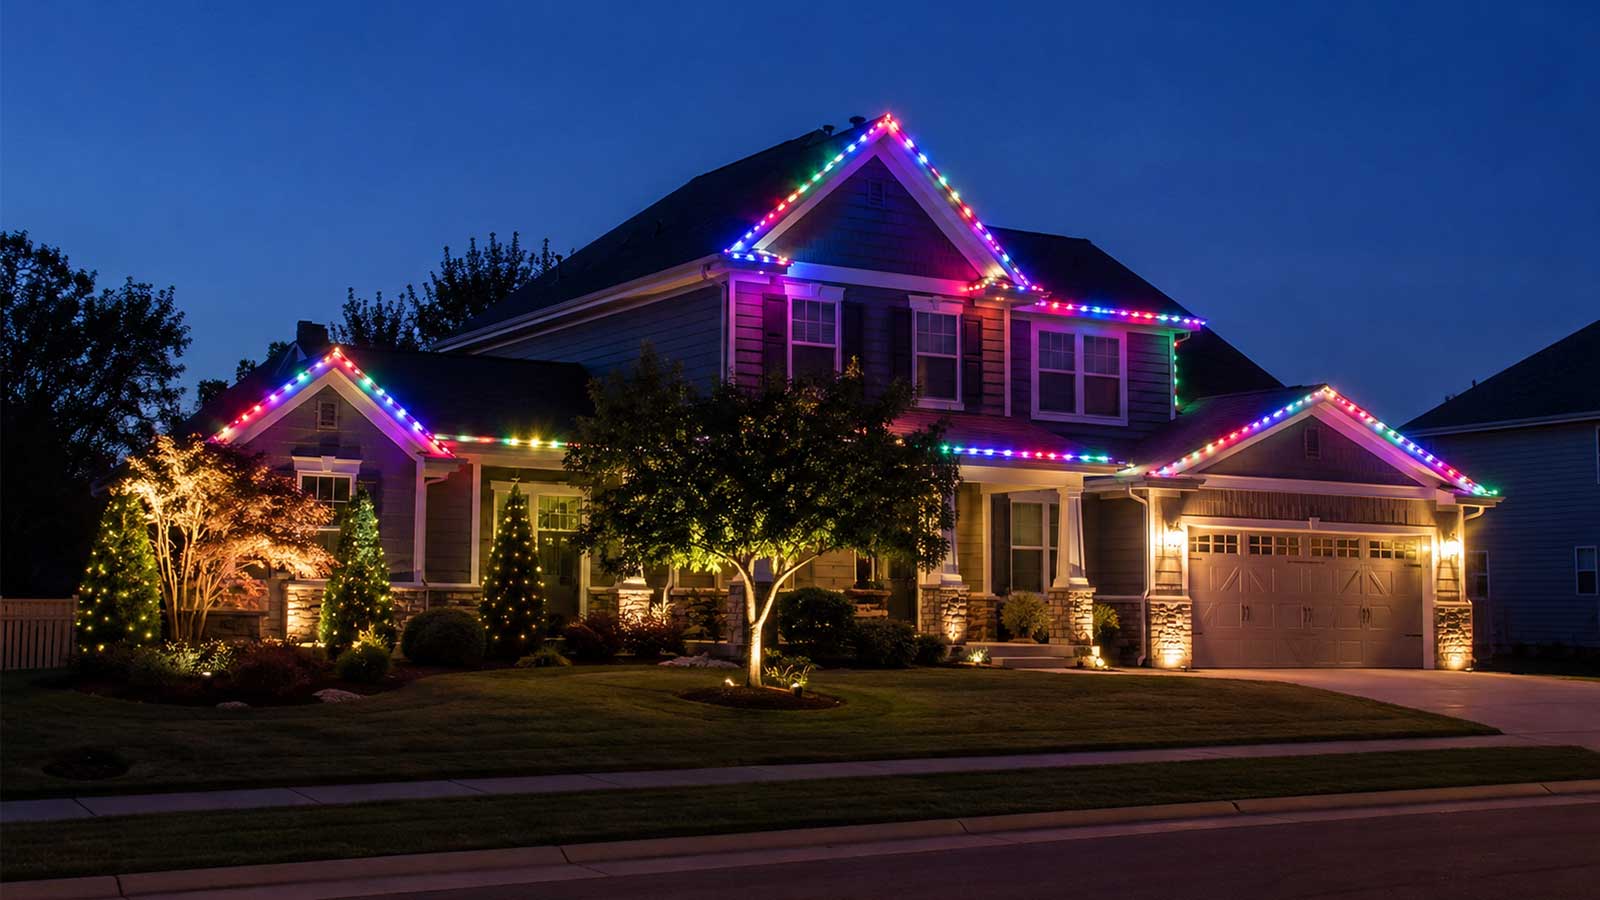
Pixel Christmas lights are individually addressable RGB LEDs. Each light carries a tiny driver chip, so a controller can set that one light’s color while every other light on the string does something else. That’s how a wave of blue chases a streak of white across a roofline.
The phrase covers three different purchases, though, and that’s where people get burned. A boxed app strand, a permanently installed roofline, and a full sequenced show all get sold as “pixel Christmas lights.” They cost different money and they do different things. Someone who buys the wrong one finds out in December.
We build and sell the gear for the third path, and we stock permanent lighting too. So we’ll price all three and say plainly when the cheaper one fits your house better.
What are pixel Christmas lights?
Pixel Christmas lights are strings of individually addressable RGB LEDs, which is why you’ll also see them listed as RGB pixel Christmas lights. Each light carries a small driver chip, so a pixel controller can set its color and brightness one light at a time. Regular Christmas lights show one color at a time across the whole string. A pixel string shows hundreds of colors at once, which is what makes animation possible.
That’s the shopper’s version. For the full picture of how a pixel works and what “addressable” means at the chip level, read our complete guide to pixel lights.
The three ways to buy pixel Christmas lights
App-controlled strands come in a box. Twinkly and similar brands sell a strand with a built-in controller and a phone app full of preset effects. You plug it in and pick an effect. Setup takes minutes. They’re programmable pixel Christmas lights in the loosest sense: you pick from effects someone else built.
Permanent roofline systems get installed in a track under your eaves and stay up all year. Govee sells a DIY version. Trimlight, Gemstone, and EverLights sell installed versions with a crew. You run them from an app and leave them up for Halloween, Christmas, game nights, and the Fourth of July.
Custom pixel shows are what people mean when a display stops traffic. You buy pixels, a pixel controller, a power supply, and wiring, then build your own animations in free software. This is the path that syncs to music frame by frame and grows a mega tree next season.
The three paths compared
Prices checked July and August 2026. Consumer strand pricing moves the most, especially around Prime Day and Black Friday.
| App-controlled strand | Permanent roofline | Custom pixel show | |
|---|---|---|---|
| What it is | Boxed RGB strand with a built-in controller and app | Track installed under the eaves, left up year round | Pixels, controller, power supply, wiring, free software |
| How it’s controlled | Vendor’s phone app | Vendor’s phone app | xLights or FPP on your own computer |
| Price | About $113 for 250 LEDs, about $190 for 400 LEDs (Twinkly Strings, Walmart, July 2026) | $2.99 to $5.30 per foot DIY (Source: Govee, 2026). $18 to $40 per foot installed (Sources: HomeGuide 2026, Trimlight 2026) | $0.25 per pixel for 12V xConnect bullets, plus the controller, supply, and wiring |
| Expandability | Inside that brand’s ecosystem only | Vendor modules only | Add props, ports, and pixels for years |
| Sequencing to music | Preset effects. xLights control is unofficial and unreliable | Preset scenes only | Full, frame-accurate, your own design |
| Install effort | Minutes | A weekend DIY, or a crew for a day | Several weekends the first season |
| Outdoor life | A few seasons | 10 to 20 years claimed by vendors | IP68 pixels, many seasons |
| Who it fits | You want color tonight and nothing more | You want year-round lighting and no annual ladder work | You want a show you design and keep growing |
App-controlled strands: what you get, and where they stop
A Twinkly Strings 400-count strand covers about 105 feet and runs around $190 (Walmart, July 2026). The 250-count runs about $113. That works out to roughly $0.30 to $0.45 per LED, which is more per light than show pixels cost, and the strand includes its own controller and app.
For a lot of houses that’s the right buy. If you want color on a tree and a porch rail, you want it working tonight, and you have no plans to sequence anything, a boxed strand does that well and we won’t talk you out of it.
The box doesn’t tell you this part. Twinkly’s marketing says you can import effects built in Madrix and xLights (Source: Reinders, Twinkly Pro product page). What builders report is different. Driving Twinkly from xLights depends on unofficial Art-Net and DDP bridges, and the xLights issue tracker carries open reports of it failing (Sources: xLights GitHub issues #4101 and #5552, xled-docs). We’re naming both sides because they’re in direct conflict, and this is the most expensive misunderstanding a first-time buyer can make.
What a boxed strand can’t do: run a sequence you designed, drive a mega tree or an arch or a singing face, or join another brand’s hardware on the same show. The app is the ceiling.
Permanent roofline systems: year-round, app-run, not sequenced
Install Govee’s permanent outdoor lights yourself and the lights run $2.99 per foot for the Basic H705A up to $5.30 per foot for the Flagship H707A, or roughly $299 to $860 for 100 to 200 feet (Source: Govee, 2026). Govee also discloses that a run can’t be extended past 150 feet without their driver module.
Professional systems cost more because the quote includes a crew. HomeGuide’s 2026 figure is $20 to $40 per linear foot installed, with most homes landing between $2,000 and $8,000 (Source: HomeGuide, 2026). Trimlight’s own pricing page says $18 to $35 per linear foot, with most residential projects at $2,000 to $6,000 and up (Source: Trimlight, 2026).
Watch that distinction when you compare quotes. A $3 per foot number and a $30 per foot number aren’t the same product measured differently. One is a box of lights. The other includes a truck, a ladder, and a warranty.
These systems do their job well. They’re also app-locked. None of them runs an xLights sequence you built, and none of them drives a prop in your yard. We stock permanent lighting for the customer who wants exactly that and nothing more.
What a real pixel show is made of
A show isn’t a product. It’s five parts working together, and missing one leaves you with a box of lights that won’t turn on.
Pixels. The LED pixel Christmas lights themselves, sold as bullet nodes, square nodes, or strip. Our 12V WS2811 bullet resistor pixels are xConnect, 4 inch node spacing, 18awg wire, IP68 rated, and run $12.50 for 50 count or $24.99 for 100 count. That’s $0.25 a pixel. WS2811 is the driver chip most show builders run. If you want the chip-by-chip comparison before you order, read WS2811 vs WS2812.
A pixel controller. The board that reads your sequence and tells each pixel what to do. Pixels don’t work without one and they don’t plug into a wall. Boards range from our 8-Port Ethernet Controller at $55 to the VIVID 8 at $169.99, which adds wide voltage support, DMX output, and long-range receiver ports. Port count and pixel ceiling are the specs that decide which board you need, and choosing the right xLights controller walks through how to size one.
A power supply. Pixels run on low-voltage DC, not household AC. A MEAN WELL LRS-350-12 delivers 348 watts at 12V and costs $27.99 from our power supplies page. Which voltage you build on changes how often you feed power back into a run, and that call is covered in 5V vs 12V vs 24V pixels.
Wiring. Extensions, pigtails, and mounting hardware. xConnect round extensions run $2.80 to $9.99 depending on length, pigtail sets of 5 run $5.75, and a 200 foot roll of mounting strip is $59.99.
Software. xLights is free and open source, and it’s the standard in this hobby (Source: xLights.org). FPP, the Falcon Player, is also free and plays the show back without leaving a laptop in the garage. There’s no subscription anywhere in this stack. xLights 101 covers building the first sequence.
What a first custom display really costs
Most guides answer this with “it depends.” Here’s a number, and here’s what it assumes.
The display: 150 feet of roofline at 4 inch node spacing, which is what our standard bullet strands ship with. That’s 450 pixels, so you buy 5 strands of 100 and keep 50 spare.
| Part | What you buy | Cost |
|---|---|---|
| Pixels | 5 x 100 count 12V WS2811 bullet, xConnect, IP68 | $124.95 |
| Controller, supply, enclosure | YPS 8-Port Ready 2 Run, 12V, assembled and tested | $265.00 |
| Mounting | 200 ft mounting strip | $59.99 |
| Extensions and pigtails | Roughly 8 xConnect extensions and 2 pigtail sets, depending on how far your runs sit from the controller | $40 to $70 |
| Software | xLights and FPP | $0 |
| Total | $490 to $520 |
Your Pixel Store prices as of August 2026.
Two things in that table catch people off guard.
The pixels are the smallest hardware line. At $124.95 they’re a quarter of the build. Every product grid on page one of Google leads with pixel prices, because pixels are the cheap part and the cheap part sells the click. The controller and the power behind it cost twice as much.
The second is what “controller” actually means on an invoice. The Ready 2 Run is built on our 8-Port Ethernet Controller, which is $55 as a bare board. Add the $27.99 LRS-350-12 supply and you’re at $82.99, and you still have no enclosure, no jumpers, no glands, and no fuse, and nothing is wired or tested. The Ready 2 Run build at $265 arrives with the board, the 350 watt supply, and the metal enclosure assembled, tested, and shipped free. You’re paying for the build, not the parts. The most common first-season call we take is from someone who bought a bare board and didn’t know the rest was separate.
If you’d rather start smaller, our pixel light show starter kit bundles a shorter version of the same parts from $99.99.
Add a mega tree, arches, or a matrix and the total climbs. A mega tree is the usual second-year purchase, and it plugs into ports you already paid for. That’s next season’s problem, and it should be.
What to buy first, and what waits until next season
- Lay out your house in xLights before you buy a single pixel. The software is free. Drawing the roofline first tells you your exact pixel count and how much power you need. Guessing is how people overspend by a hundred dollars on the wrong strand lengths.
- Buy the controller with room you don’t need yet. An 8-port board running one roofline this year runs the whole house in three years. You buy it once. Ports are the thing you can’t add later.
- Do the roofline and nothing else. One clean outline teaches you the whole workflow: mounting, power, data, sequencing, and opening night.
- Add props next season. Mega tree, arches, singing faces. Each one plugs into the controller you already own.
Waiting until year two: a second controller, a matrix, and finished custom sequences. None of them makes a first roofline better.
Power and safety basics
Pixel strings pull real current, and undersizing the supply is the failure we see most in a first season.
A 12V resistor bullet pixel draws about 0.3 watts. Your 450 pixel roofline pulls roughly 135 watts at full white, so one 348 watt LRS-350-12 covers it with headroom left over. We rate that same supply at about 1,200 pixels running at 30% brightness, which is where most shows actually live.
Published pixels-per-supply numbers disagree, and it’s worth knowing why before you trust one. Blinky Pixels lists about 467 pixels on a 350W supply at 100% brightness. Wired Watts’ calculator returns 933 pixels at 50% using the formula (supply watts x 80%) divided by (pixel watts x brightness %) (Source: Wired Watts). Ours says about 1,200 at 30%. Those aren’t in conflict once you see what each one assumes. Regulated pixels draw roughly twice what resistor pixels do, and brightness changes the answer more than anything else. Ask which pixel type and which brightness a number assumes before you buy against it.
Standard practice in this hobby: fuse between the power supply and the controller, run outdoor-rated connectors and sealed glands, and put the display on a GFCI circuit. None of that is optional in a yard that gets rain. Where your load gets significant, have a certified electrician check the circuit.
Are pixel Christmas lights worth it?
Compare it against what people already spend. HomeAdvisor puts average seasonal Christmas light installation at $220 to $683, averaging $443, at $2.50 to $7 per foot (Source: HomeAdvisor). That’s a service you buy again every year, and at the end you own nothing.
A $500 pixel roofline costs about one season of hired installation. The difference is that the pixels, controller, supply, and wiring come back out of the bin next November. Year two costs you the time to hang them.
The honest answer runs by reader. If you want animation you design, synced to music, growing every season, the custom path pays for itself in two years and does something the other two can’t do at any price. If you want color on the house with no learning curve, buy the strand. If you want lights up all year and never want the ladder out again, price the permanent systems. All three are real answers.
First-buy mistakes we see most
Mixing connector systems. xConnect and Ray-Wu look similar and don’t mate. Pick one and stay on it across pixels, extensions, and pigtails.
Undersizing the power supply. A supply that browns out mid-show reads like a data problem and wastes a weekend of troubleshooting.
Buying a bare controller board. It needs an enclosure, a supply, jumpers, and a fuse before it does anything.
Buying into a closed ecosystem you’ll outgrow. If there’s any chance you’ll want a mega tree in two years, a boxed app strand is money you spend twice.
Ordering pixels before laying out the house. Spacing and strand count come out of the layout, not the other way around.
Frequently asked questions
How much do pixel Christmas lights cost?
A boxed app strand runs about $113 to $190 (Twinkly Strings, July 2026). DIY permanent roofline lighting runs $2.99 to $5.30 per foot (Source: Govee, 2026). A custom sequenced show starts around $490 to $520 for a 450 pixel roofline, including pixels at $0.25 each, a Ready 2 Run controller, mounting, and wiring.
Do you need a controller for pixel Christmas lights?
Yes, for a custom show. Pixels carry no intelligence of their own and they don’t plug into a wall. A pixel controller reads your sequence and sends data down each string, and a separate power supply feeds them low-voltage DC. Boxed app strands include a small controller in the box, which is why they can’t be expanded.
Are pixel Christmas lights worth it?
If you’re shopping pixel lights for Christmas, want animation you design yourself, and plan to reuse the gear, yes. A $500 roofline costs about what one season of hired installation costs, and the parts come back out next year. If you only want app color with no learning curve, a boxed strand or a permanent system is the better buy.
Can pixel Christmas lights be sequenced to music?
A full pixel show can, frame by frame, using free software like xLights or FPP (Source: xLights.org). Boxed app strands mostly can’t. Twinkly markets xLights import, but builders report the connection depends on unofficial bridges and often fails (Source: xLights GitHub issues #4101 and #5552).
How many pixels do I need for my house?
Measure your roofline in feet, then divide by the node spacing. Our standard bullet strands run 4 inch spacing, which is 3 pixels per foot. A 150 foot roofline needs 450 pixels, so you’d buy 5 strands of 100. Lay the house out in xLights first to confirm before ordering.
How long do pixel Christmas lights last outside?
Show pixels rated IP68 hold up for many seasons and get stored between them. Boxed consumer strands typically last a few seasons. Permanent installed systems are marketed at 10 to 20 years, though those claims come from the vendors selling them.
If you’re comparing pixel Christmas lights for sale and don’t want to guess on pixel count or power, book an hour of one-on-one help at $120 and we’ll work through your layout with you before you order anything.